ULooka Camera Setup Manual
Follow these steps to download the app, configure the network, and complete basic device setup.
APP Download mode
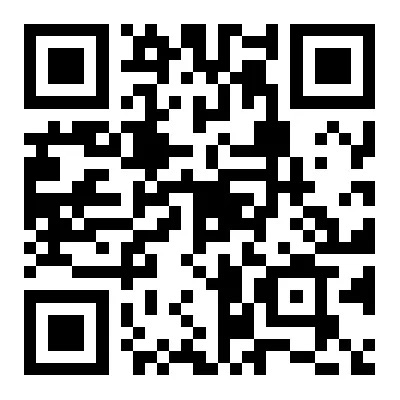
- Android phone can open the browser to scan the two-dimensional code below or search [ULooka] for download;Scan the qr code below with your own camera or search and download it in the APP Store.
- Open the APP, read the “App privacy protection protocol”, and click “Agree”. APP pop-up prompt: message push notification permission, APP location permission, please go to settings and confirm.
The network configuration
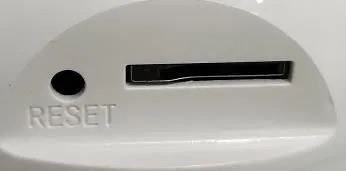
- Connect the device to the power supply, press and hold the RESET button for about 3 seconds to hear “di”.
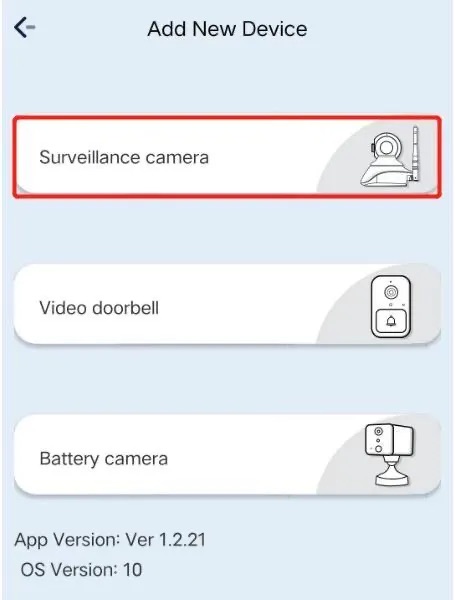
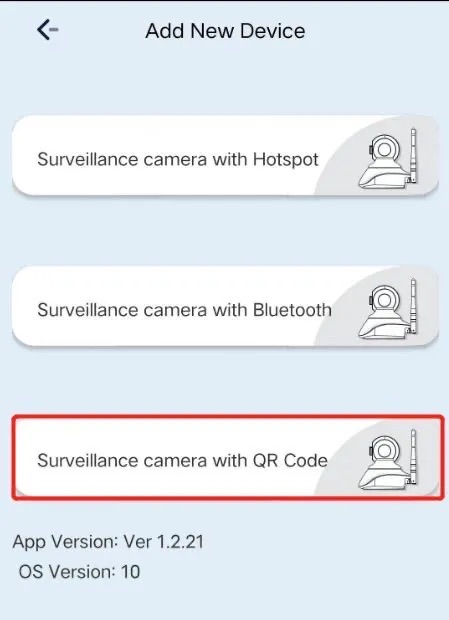
- Open the APP, click “+” to add devices, and select “Surveillance Camera-Surveillance Camera with QR code “.
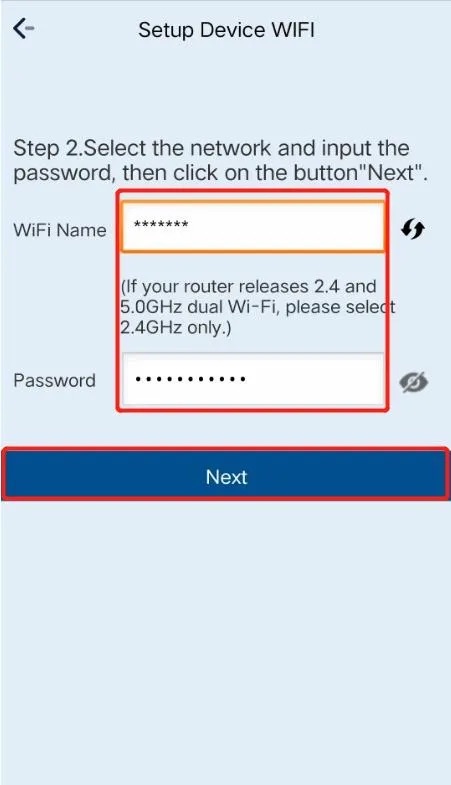
- Confirm that the reset is successful, click Next, and enter the WIFI account and password.
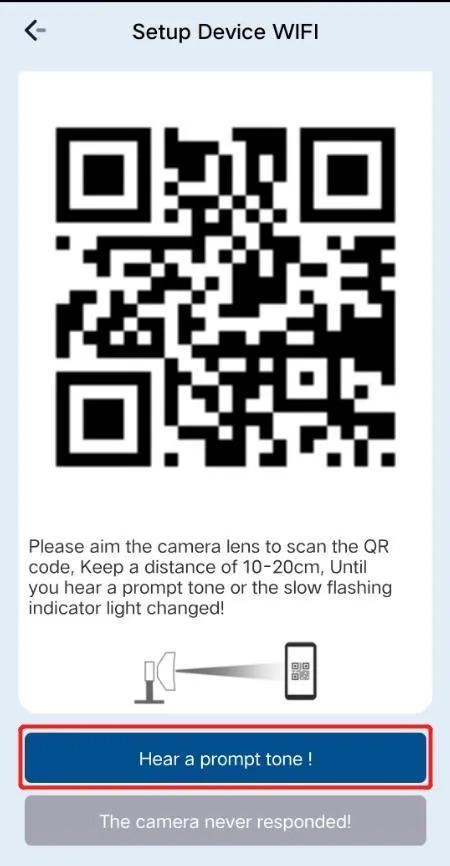
- Please aim the video camera lens at the mobile phone to scan the QR code(Please remove the lens protector when scanning the code), keep a distance of 10-15cm until you hear the prompt tone, and click “Hear the prompt tone”
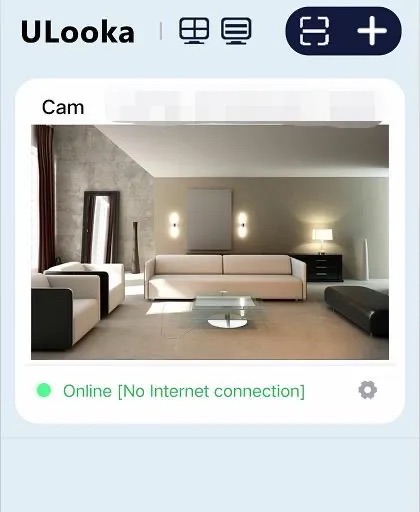
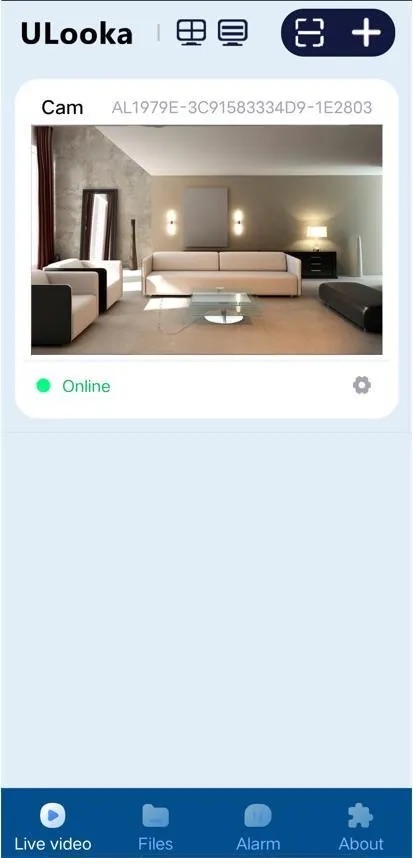
- The device is added successfully, enter the home page, click the device to preview the real-time interface.
(Remarks: If the connection is not successful, please check whether the WIFI name and password are correct, only 2.4G wireless network is supported;Or reset the device and reconnect according to the above steps)
Interface specification
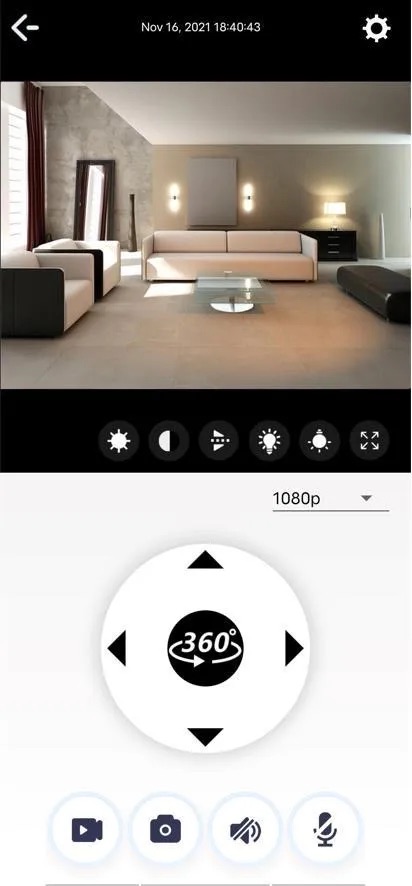
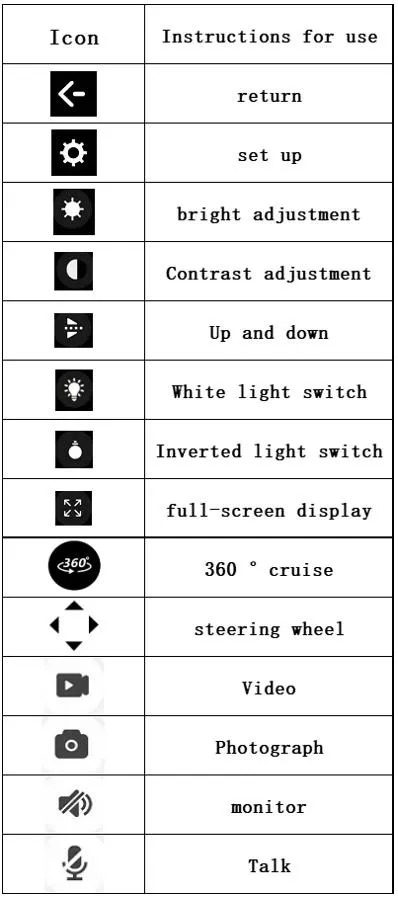
1.The home page interface
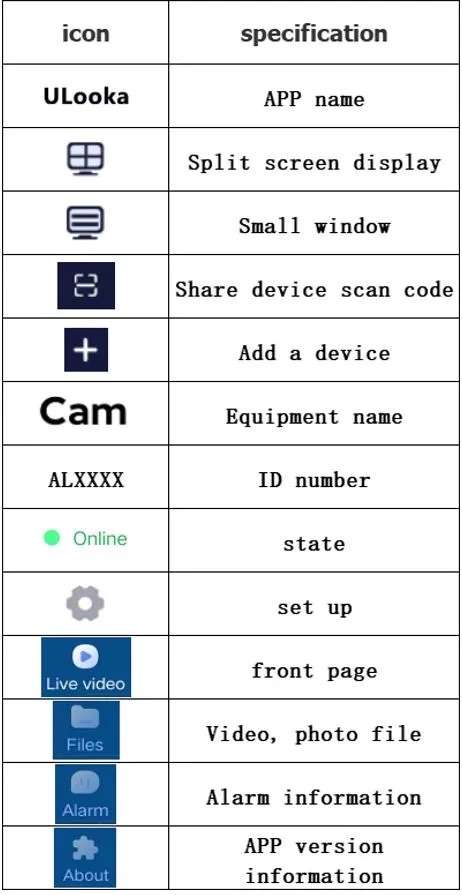
2.Device control interface
Device Driver Upgrade
Open Settings → Device Settings → System Update → Upgrade. If the upgrade file is detected,the driver of the latest version can be upgraded online.

Reset instructions
Press the RESET button for about 3 seconds with the pin, if “drip” is heard, the RESET is successful, and the device is self-checked.
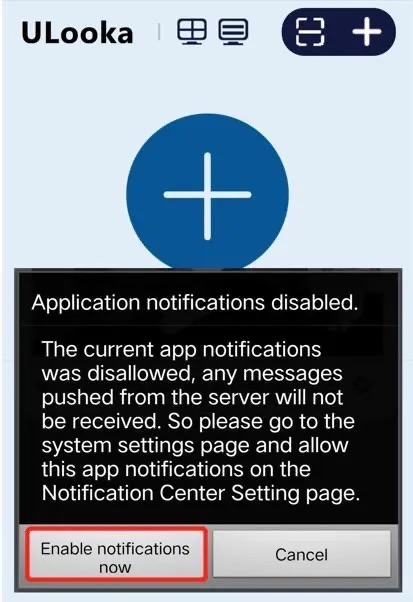
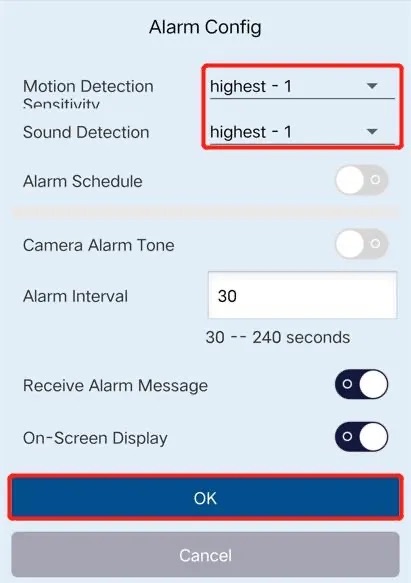
Alarm information push
New users open the App system will prompt “Application notifications disabled.” (as shown in the picture), go to the mobile phone Settings → Apply permission management,find this app to open the permission notification permission. Then open Settings → Device Config → Alarm config in APP to enable Motion Detection Sensitivity or Sound Detection (as shown in the picture).
Matters needing attention
- Only 2.4g WiFi is supported. Ensure that the connected WiFi is 2.4g.
- The device only supports TF-card video storage. Do not hot-swap the memory card.If you need to format the memory card, please first turn off the recording in Settings → Device Config →SD Card Record Config.
- The device supports only FAT format and a maximum of 32 GB.The TF card in Exfat format can be used only after formatting.
- The device uses loop recording technology, and when the TF card is full,the camera automatically overwrites the earliest video.
- Do not install the product in a harsh environment such as rain, high temperature, high humidity, dust, or smoke. Otherwise, the device may be damaged.